As many of us will have been reading about and hearing about in the news, online and in our feeds. Due to the situation in eastern Europe at the minute, many governments and their agencies are warning of an increase in both phishing and hacking at this time.
There are a number of measures you can employ to counter these, such as
- Enable MFA
- Keeping systems updated (Patching)
- Using complex passwords (a password manager can help)
- Staff Training (this is possibly your weakest point)
- Enable phishing and email protection
One of the ways that help, if you have Microsoft (Azure), is by using Conditional Access to block user logins by geographic location. This can add an extra layer of security to your Microsoft environment in the event one of your staff’s passwords become compromised.
Below we will outline a process using Microsoft Azure Active Directory and Active Directory Conditional Access that I have deployed to block access based on geographical location.
What is Conditional Access Location Blocking?
Conditional Access blocking based on location is where you can block a user from accessing your systems if they are attempting to log in from a country that they either do not have permission to be in or should not be in. It is also used to stop access and traffic from countries where you do not have users, or it is unusual for you to have users working from.
An example would be that you are positive that nobody in your organisation should be attempting to log in from Antarctica (yes, an actual location option) to access their emails, share point or even Teams. Then once you have established that this is not one of your users, you can block these locations.
Another use that we have used is to block countries where we are getting large numbers of failed logins from that we are sure are malicious attempts.
You should note that if the locations are defined by IP Address, a VPN could bypass this rule. You can select GPS via the Microsoft Authenticator app (more info here)
How To See Your Login Locations
It is a good idea to first see what locations your organisation has been accessed, or attempted to be accessed, from over a set period of time. This is an especially useful task to carry out in conjunction with your HR/People Team in light of recent events.
We carry this out via Microsoft Sentinel on a weekly and monthly occurrence for a number of reasons, including Failed login attempts over a prolonged period and also it can help find configuration issues with servers etc.
You can easily check both successful and unsuccessful logins by using one of the inbuilt queries in Microsoft Sentinel (SignIn Locations). You can adapt this to pull out the users or user display names.
This can be found in Sentinel > Logs > Queries > Signin Locations
You can use the search bar as I have to speed this up.
You will also need the Microsoft Country Codes, which can be found here.

How Do They Know Where Users Are?
Below we will be highlighting how to block users by location based on their IP address. This is where Microsoft will collect their IP address from the device that they are logging in with. Microsoft will then use their database to resolve or match this IP address to a known location or country. This is not always an exact science with Microsoft as they are known (in my experience anyway) to not be as accurate as they could be.
You can determine the location of a user by GPS. However, this requires the user to have the Microsoft Authenticator app installed on their mobile device. This will then be used to connect to the system, initially to authenticate the user (done every 24 hours) and then silently each hour to determine the user’s GPS location.
You can find out more here
Create a Named Location
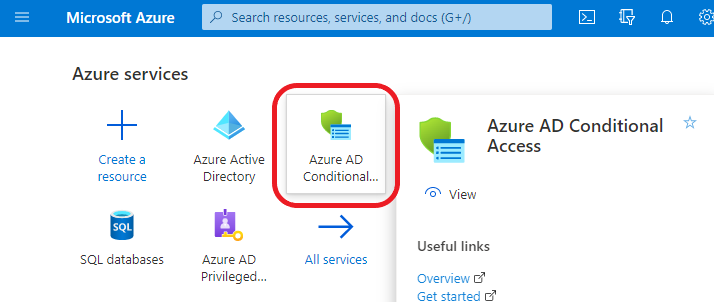
Step 1 – Login to Azure > https://portal.azure.com/#home
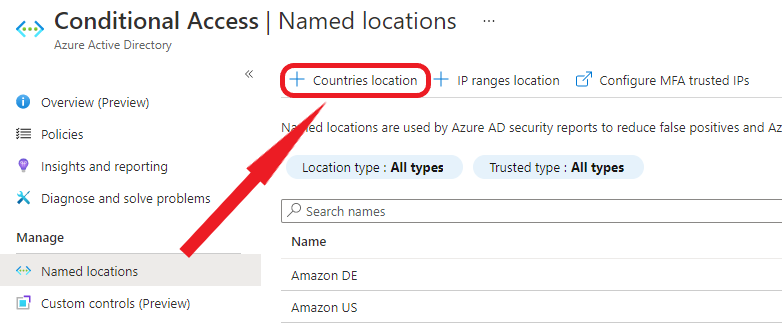
Step 2 – Select Azure Active Directory Conditional Access Tab
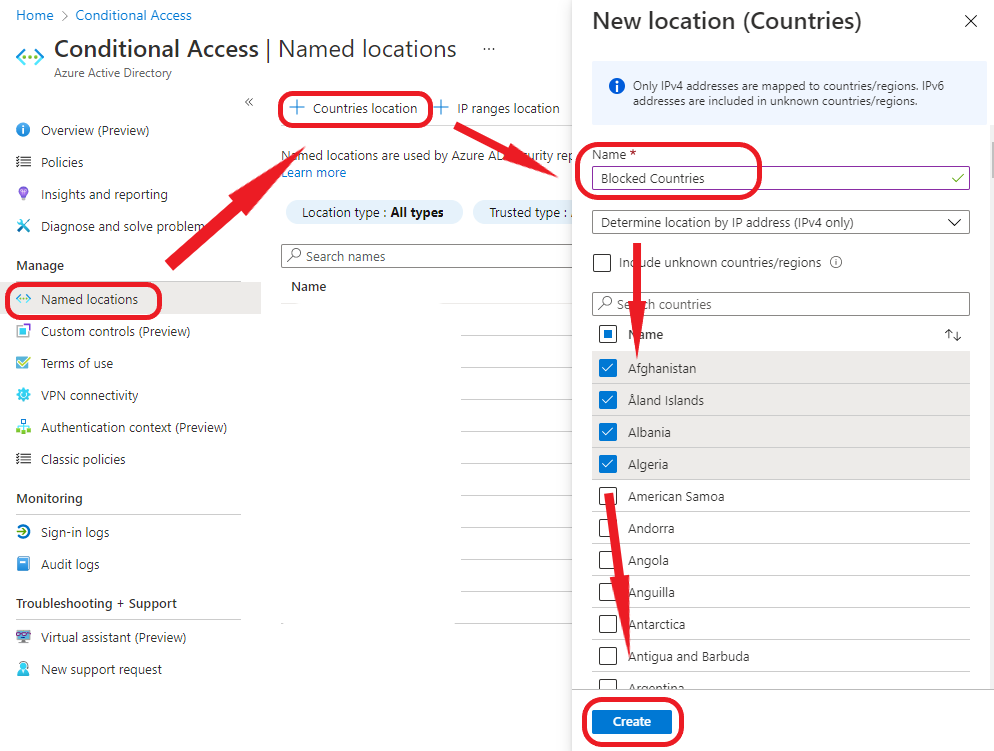
Under Manage Section select Named locations > New Countries Location.
Step 3 – Name you new location Blocked Countries, select Countries/Regions and check any countries you wish to block.
Then Click Create
Create A Conditional Access Policy
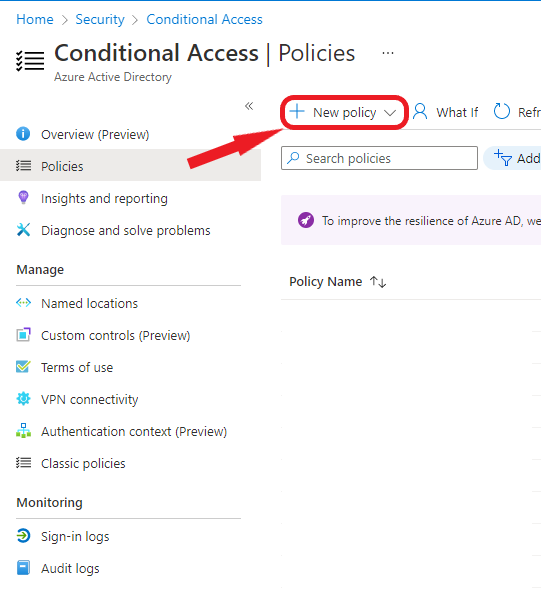
Step 4 – Next go to Policies and select New policy.
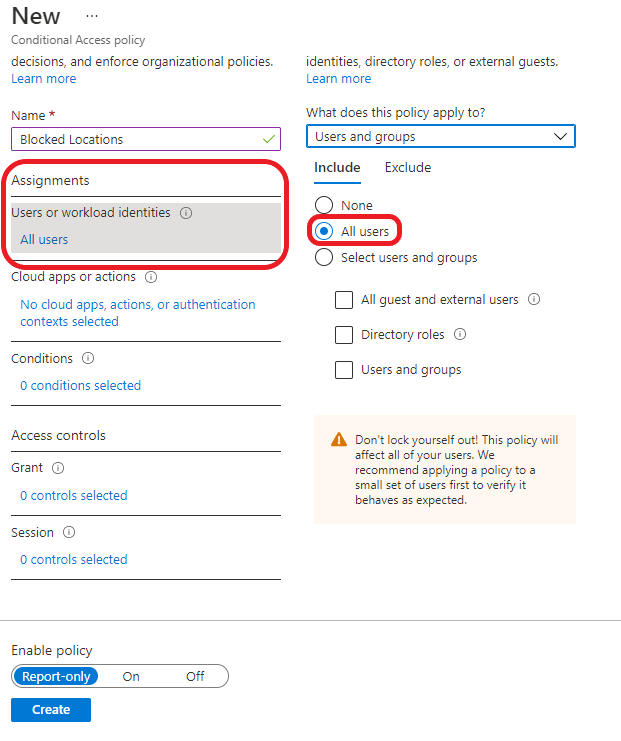
Step 5 – Name the Policy Block Locations.
Step 6 – In Assignments select All users (you can also select specific users or groups if you wish – this may be useful for testing) that you want the policy to be applied to.
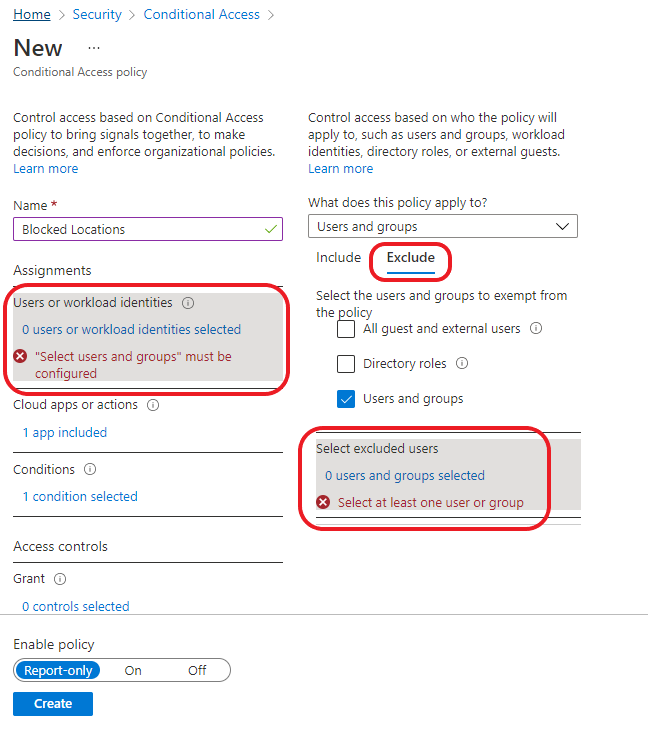
How to Exclude Users or Groups From Conditional Access
For users or certain groups who you do not want to be included in this rule you can select the Exclude tab and enter those users or groups as needed. It may be a good idea to exclude yourself and another admin initially.
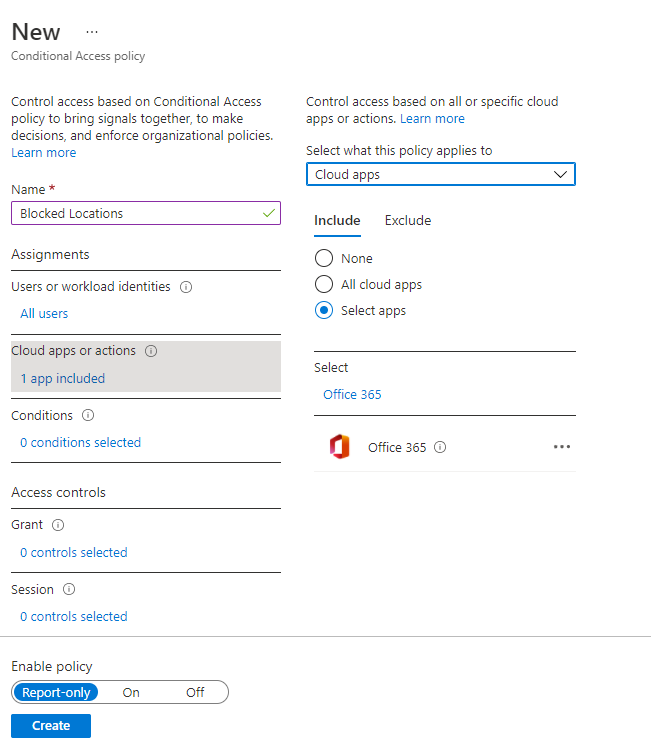
Step 7 – Select any cloud apps you want the policy to apply to and block access to the apps based on location. The example here uses all the Office 365 apps.
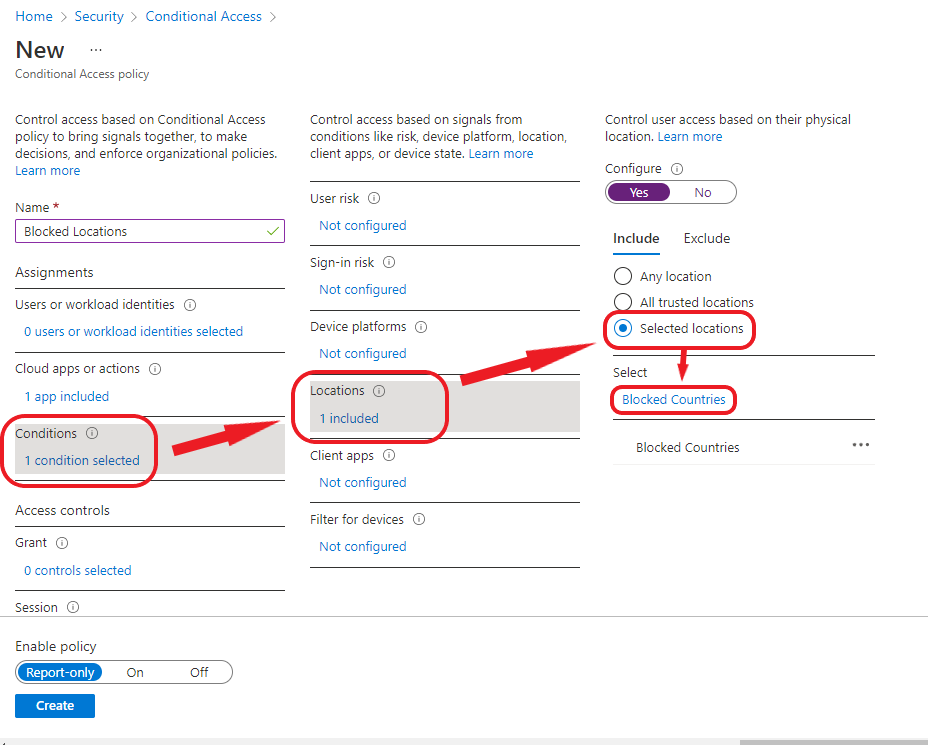
Step 8 – Select Conditions > Locations > Selected locations > Blocked Countries. (or what ever you named it earlier in the process.)
Then click Create
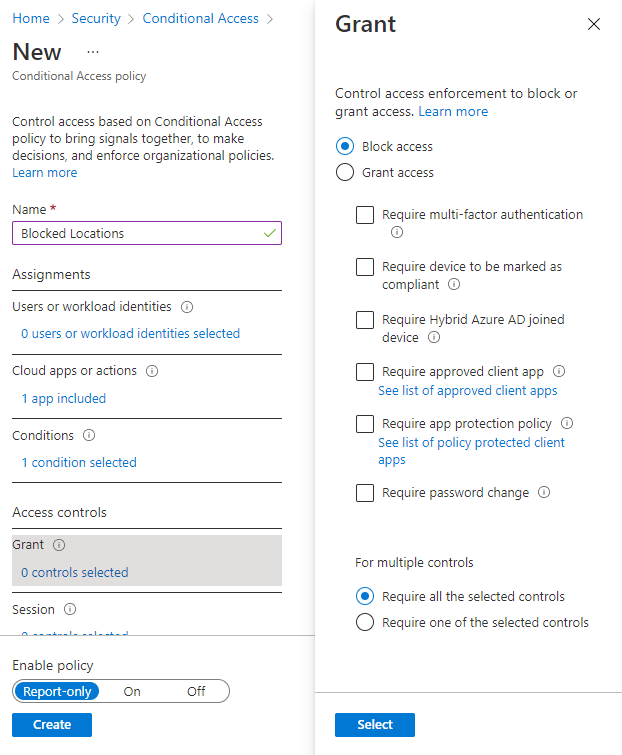
Step 9 – In Access controls select Block Access. Note: this rule can also be modified here to force multi-factor authentication rather than a block
Then click Enable Policy (or Report Only as below) and then Save
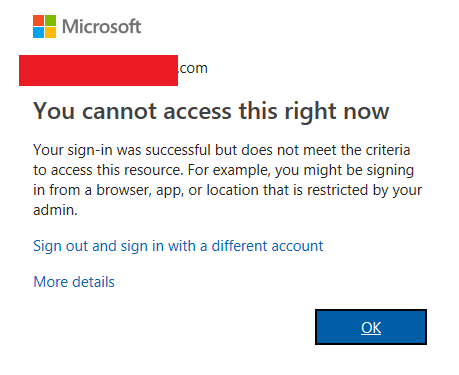
Once you have completed all of the steps and saved your new Conditional Access rule, your users (or anyone who gains access) will see a pop-up and be blocked from going any further.
I can decide if I like the fact that Microsoft has said in the pop up that their login was successful or not, however, this is what they will see
As always I would suggest testing this out on a small number of users in your organisation before pushing it out globally.
Please feel free to leave a comment or let us know if you know of a different way of doing this.